
Station repairs and upgrades can take place all year round, inside and out. That said, Hams who live where the chilly winds blow and the snow flies during the winter prefer working indoors. In this article, I’ll focus on improvements that can provide a big bang for the buck in a small or medium-sized fixed station. These upgrades also make sense for portable stations that might be used at Field Day or when participating in one of the popular “…On the Air” (OTA) programs after the weather improves. We’ll leave the antenna farm until spring and focus on your “inside game” with a general approach so you can fill in the blanks with what makes the most sense for your interests.
As you develop a list of things to add, repair, or discard, they will probably fall into one of the broad topics to follow. I’ll present some common opportunities for an upgrade and you can add from your list. The combination will keep you busy, and your station will be better when your favorite operating event rolls around!
Station Notebook—Your Ham Radio Memory
One of the most important aspects of upgrading your station isn’t a piece of equipment at all—it’s your station notebook. The station notebook is one of the best ways to make your work pay off. When you notice something, bad or good, writing it down will ensure that you don’t forget about the issue. This is where you record those important observations like, “The 20 meter dipole has an intermittent SWR problem,” or “Can’t read the rig’s display in direct sunlight.”
Like a logbook of your on-the-air activities, the station notebook is where you record information about the equipment in your station. For example, write down test results after you install something new or make a repair, like an SWR curve for a new antenna or how much power you can get out of an amplifier on each band. What color of wire did you use for the connections to your rotator? What size hardware did you use to attach the vertical to the mast? What is the wiring diagram and fuse list for how you hooked up the battery charger and the power distribution strip? Make writing in your notebook a habit.
After every contest or comm team activation, even if it’s just you by yourself, do a “hot wash” to capture ideas and notes about station performance. Was it hard to reach the antenna tuner? Did your power supply smell hot after operating on 80 meters? Maybe that chair cushion needs replacement or the doggone foot switch kept moving around under the desk. Write it all down!
Ergonomics
The least noticed improvements can have enormous effect on scores, stamina, and success at doing whatever it is you are trying to accomplish. These fall under the general heading of ergonomics. Making ergonomic upgrades improves your operating practices and maximizes your ability to perform at your best.
In a fixed home, club, or EOC station, maximizing “butt in the chair” time is important for top performance. The biggest favor you might be able to do for yourself and other operators is to get a comfortable chair or chair cushions. A good-quality, adjustable office chair costs a lot less than a new radio! Having a couple of different cushions on hand can accommodate different operators or just change your posture a little bit. Field Day and other portable stations benefit from seating comfort, too. Vehicle manufacturers pay a lot of attention to seat comfort—you needn’t wonder why!
Next, think about what you look at most while you operate. It might not be the radio. In many stations, the most looked-at piece of equipment is the computer screen. Make sure it’s placed at a height and angle that’s comfortable for you to look at for all those operating hours. A large, high-resolution monitor costs surprisingly little and many are available from a local PC recycler shop for far less than new. Mobile stations need to have the control head for the radio somewhere easy to see and still safe when driving. This might be a good time to pick up an adjustable mount for the dash or console. Lido makes a considerable variety of mounts for radio control heads in a vehicle.
Finally, be sure the table or desktop are at a comfortable height for using a keyboard. That same PC recycler will probably have high-quality keyboards, wrist supports, and trackballs or mice for a few dollars each. You’re going to spend a lot of time operating—a full-blown 48-hour DX contest lasts longer than a typical 40-hour work week—so make sure the operator is taken care of!
Audio
Radio is mostly audio-based; even digital operation relies on the operator being able to hear the signal. Even though Ham audio isn’t “hi-fi” according to audiophile definitions, it’s still important to hear the signal with a minimum of distortion and noise. Most radios have a very small built-in speaker which is easy to overdrive and adds distortion at high volume, such as when you’re operating outdoors or in a noisy or windy environment.
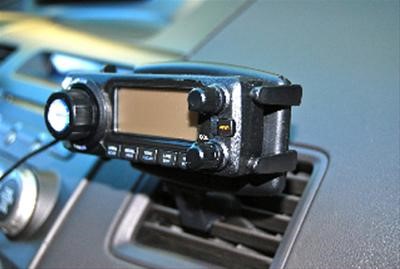
Radio manufacturers offer speakers that match the radio design for a good-looking installation. Several third-party vendors provide more choices, including built-in DSP noise reduction, such as the West Mountain Radio DSP speaker in the photo. If you already have a good speaker, you might also consider adding a DSP signal processing unit, such as the bhi DSP modules.
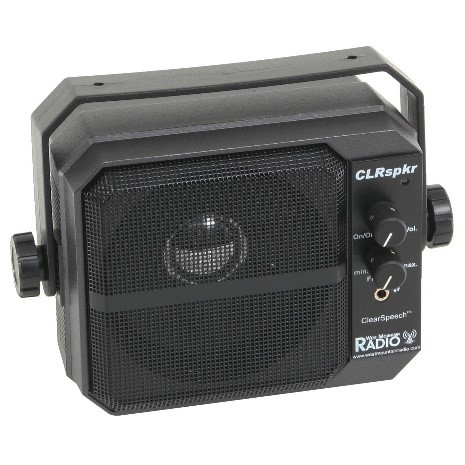
Headphones are another opportunity to improve what you hear. Most headphones are pretty good as far as audio quality goes, but ear comfort is a very personal choice. A more comfortable pair of headphones will pay off every time you use them. In a portable setting, a lightweight pair of headphones (even a single-ear model) can make a big improvement, especially with handheld radios. The smaller boom-set models with a microphone such as the Pryme or Heil Sound models in the photographs are great for operating outdoors or when supporting a public event.
Be sure to check your state’s driving laws about wearing headphones when driving. Many states don’t allow headphones to be worn by the driver while in motion. Even if allowed, it’s safer to be able to hear sounds from outside your vehicle. Try connecting your radio’s audio output to your car’s audio system through the AUX jack or a Bluetooth link. Ham Radio audio sounds a lot better in a vehicle through the audio system.
Let’s not leave out the transmit audio. We’ve all heard stations that are loud but nearly unintelligible. Don’t be that station! Start with a high-quality microphone like one of the many models from Heil Sound. You might prefer a desk mike in a home station, but for multi-operator club efforts or in a busy EOC, you’ll need good boom-sets like those pictured here. No matter how good the microphone, you can still have terrible over-the-air audio from misadjusting the transmitter. Don’t waste your dollars or your watts on distorted or splattering signals. Spend some time on the air with a friend to be sure you have the MIC GAIN, VOX, processing, and equalization controls set just right. Then record all of the settings. Where? In the station notebook, of course!
RF Performance
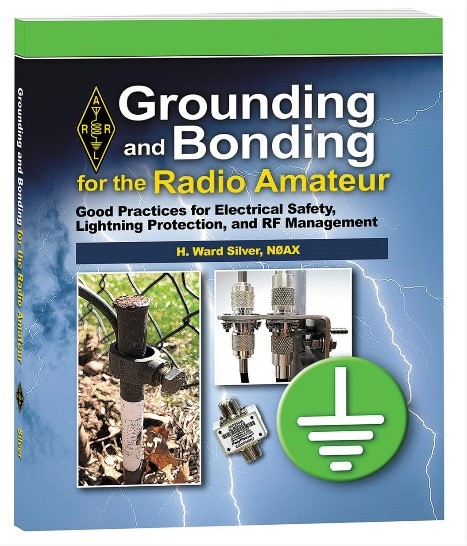
At the RF end of things, we all have a tendency to build a station incrementally (a nice way of saying “one gadget at a time”) until there is a rat’s nest of wiring. This leads to RFI and noise being able to get into the signal path where it can’t be filtered out. The winter months are a great time to get all of that wiring under control. Start by reviewing your station’s grounding and bonding. The ARRL’s “Grounding and Bonding for the Radio Amateur” (by this article’s author) can help you get started.
A continual challenge for mid-sized and smaller stations is being able to hear through the ever-rising RF noise floor. A surprising amount of noise is picked up on the shield of your feedlines and other cables. Wherever the shield isn’t connected to a metal enclosure, the noise can get inside the cable and mix with the RF signals. Be sure you’re using shielded cables with a solid connection to the enclosure at each end. On longer antenna feedlines, use ferrite core common-mode chokes to block RF noise from getting into your receiver. Type 31 ferrite is the choice at HF and type 43 at higher frequencies.
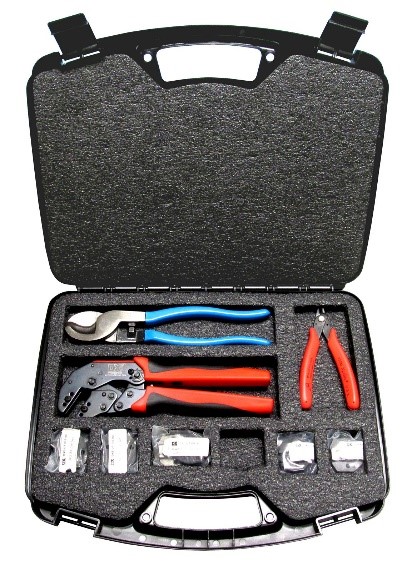
Speaking of cables, are all of them in good condition? As we add more gear, there is a natural tendency to use whatever cables are at hand, and some may be marginal, showing defects such as loose shields, exposed braid, and corrosion on the connecting surfaces. Inspect all of those cables by disconnecting them and taking a good look at the mating surfaces. Unscrew the shell of PL-259 plugs and inspect the shield soldering. If any of the cables don’t look their best, replace them. Now is a good time to learn how to use the right coax prep tools to strip and trim coax, and then crimp or solder on a high-quality connector.
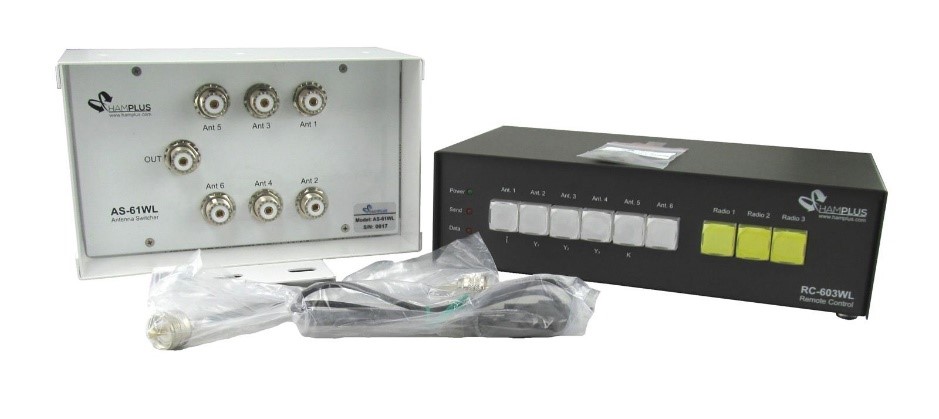
Another area that tends to get unwieldy is antenna switching. One or two antennas are not difficult to manage, but the combination of dummy load, extra antennas, and matching networks or filters can get out of hand. If you have to stop and think about what combination of switches to throw for each antenna, it’s time for an automated system. The Hamplus system in the photo is an example of automated switches that connect the right antenna based on the frequency information from your radio or manual selection. Having all the switching performed in one enclosure also makes lightning protection and RFI control easier.
Closing Thoughts
Every time you get on the air, you should be ready to learn—about your station, certainly, but about propagation, operating techniques, and your own abilities. Any top operator will tell you they are always working on improvement of the equipment and of themselves. There’s always another station to work, another hill to climb, another technique to perfect. Expect change and use it to become better because improving is never over!
Pingback: Spring Station Inspection Tips - Ham Radio News