
In the attic, you ask? Yes, in the attic!
Many Hams, including many of you reading this, are limited by HOA or other outdoor antenna restrictions. But even if you can’t put up an outdoor antenna, you can still operate with antennas installed in an accessible attic space. Lots of amateurs in these situations are doing so successfully, especially on HF. Others make it work on VHF and UHF.
For example, one of our local club members has earned his WAS (Worked All States) and DXCC awards using 100W and a simple bent-leg 20M dipole that snakes in and around his home’s attic HVAC system. Other locals are using screwdriver-style mobile HF antennas that can work with a proper ground plane installed as a base below them; aluminum plates or chicken wire can be used to create the required ground reflection. Dipole and long wire antennas can also be used with mobile/outdoor style auto-tuners feeding them in an attic space. Another local uses an HF loop antenna tacked up around the circumference of the ceiling of a second-floor bedroom. With his antenna matching unit providing an acceptable match, he’s on the air making contacts. Granted, these antenna installations are at best a compromise, but they do transmit and receive, and after all, isn’t that what it’s all about?
My XYL, Toby, KLØSS, and I are fortunate to have ample outdoor space and no restrictions limiting our current HF and satellite antennas. I recently discovered that I had stored away four VHF/UHF horizontally polarized Yagi antennas from our last QTH, and I thought it would be fun to put them up again to ease back into weak-signal work. But I wasn’t ready to install a new tower for them. Instead, I assembled a rotatable, horizontally polarized array of Yagis for 50/144/222/432 MHz in one of our attic spaces, the floor of which is about 35′ above the ground (Fig. 1).
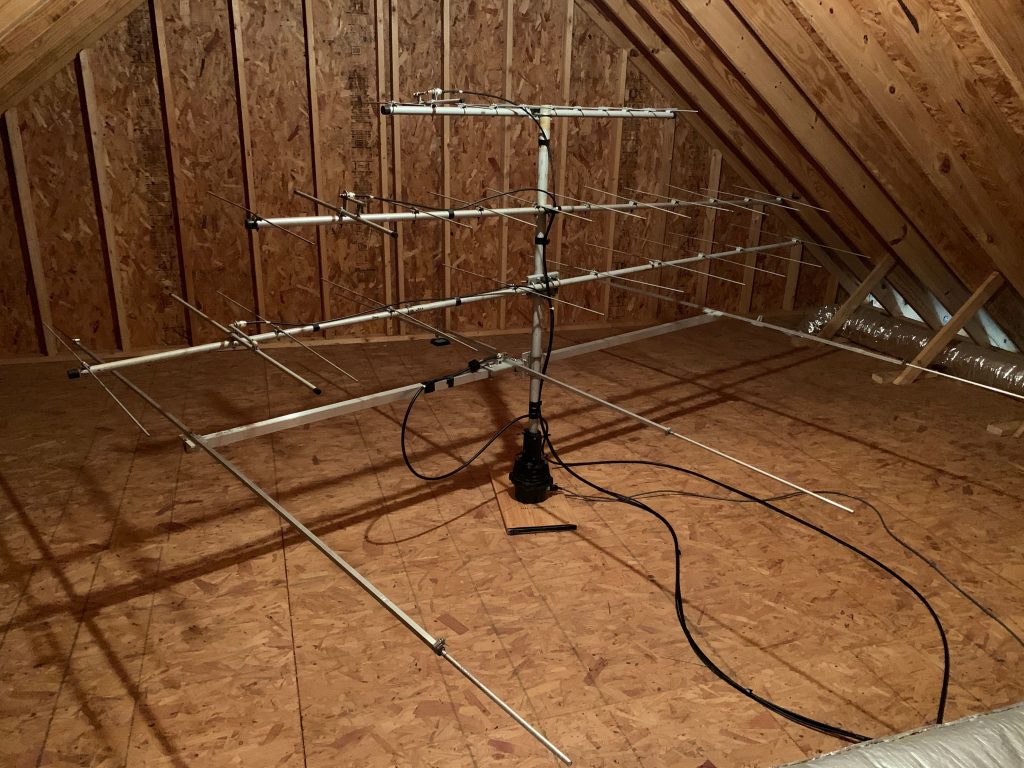
Fig. 1: KLØS & KLØSS attic antenna array operates from 50 MHz through 432 MHz
We’re blessed with three large floored attic spaces in our home. In the uppermost space I had already installed a 6M horizontal loop and two perpendicular noise canceller sense dipoles, along with a weather satellite (Fig. 2) and two VHF/UHF discone antennas (Fig. 3). After a quick tape measure check, I found there was sufficient floor space to install a rotator and my homebrew 3-element 6M Yagi. There was enough space above them to stack the other three smaller antennas on a short mast.

Fig2: KLØS 137 MHz low-earth orbiting weather satellite antenna can hear the “bird” when it’s over Cuba all the way to the Great Lakes from his southeastern Virginia QTH
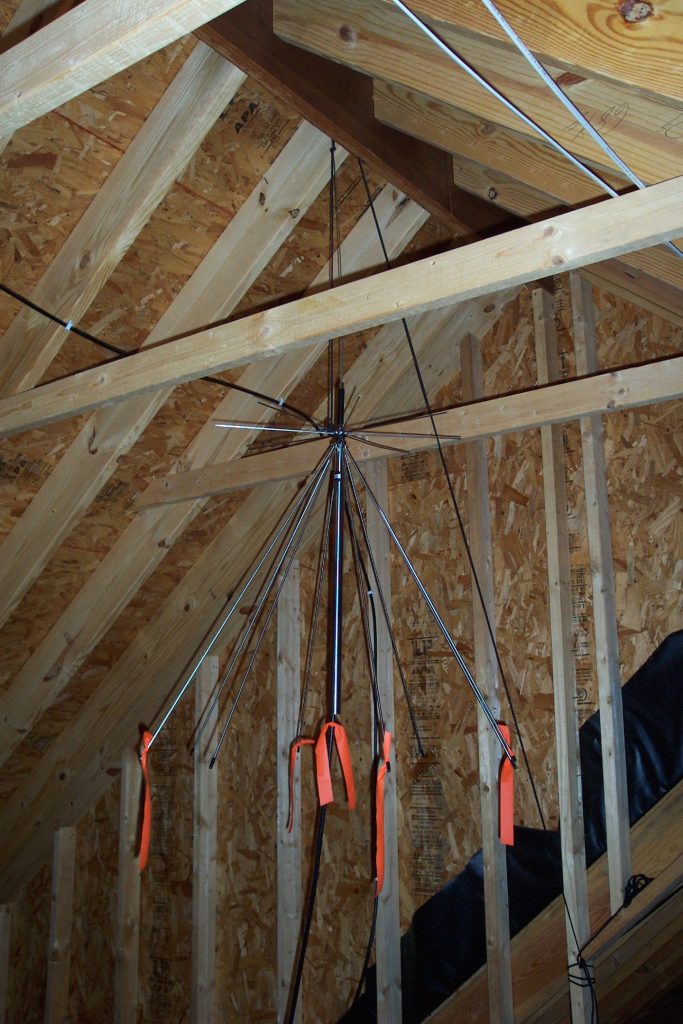
Fig 3: A VHF/UHF discone antenna provides reception from 25 MHz through 3,000 MHz and can transmit on 50 MHz through 1,200 MHz with up to 200W above 144 MHz
The rotator I used is an old Yaesu model that sat atop our last HF tower for over a decade. It had been in storage for almost as long but still functioned properly. I attached the rotator body to a small piece of plywood using the original tower mounting plate bolts. The holes for the bolts were drilled through the wooden plate and countersunk on the bottom side so the plate would lay flush against the attic floor (Fig 4).
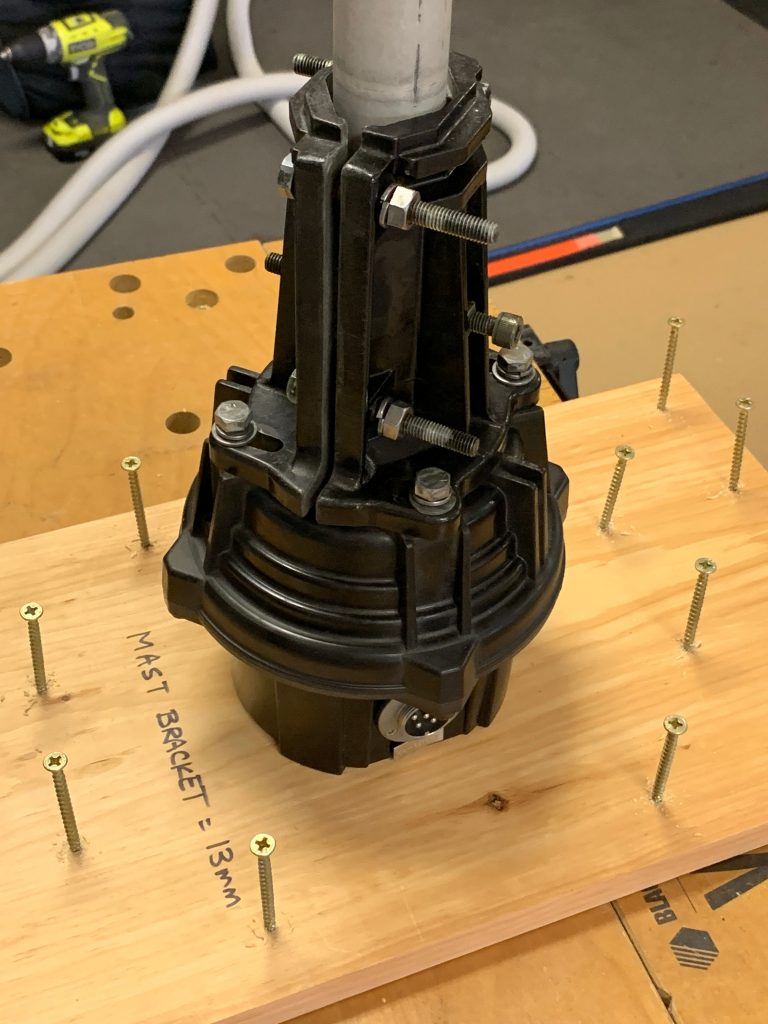
Fig. 4: Rotator attached to plywood mounting plate ready for attic installation
In the attic I determined the direction of true north using my phone’s compass app, aligned the plate accordingly, and then attached it to the attic floor with decking screws. A new control cable was also run between the rotator and the control box in the shack. One thing I didn’t have to worry about was establishing a proper tower rotator coax loop, as the cables can simply lay on the attic floor and are long enough to allow the array to turn properly through 360 degrees.
I had several RG-58/213 and LMR-240/400 coax cables in place between the shack and attic space, but instead of running more coax I decided to use a remote antenna switch in the attic to feed the 2M through 70cm beams and one discone antenna. An Ameritron 5-port remote RF antenna switch I had on hand was put into service; it did need a separate small-gauge multi-wire control cable to be run to the attic. Although the switch isn’t rated for 70cm operation, the manual says it will work on that band with a bit of acceptable loss. With that in mind, I added preamps for 144 and 432 MHz to make up for line loss. The preamps are connected directly to the antennas and are powered over the coax (Fig. 5). The Ameritron switch can be configured so that ports default open when switched instead of to ground; this allows power to be fed to the preamps without the possibility of the switch shorting the power source (Fig. 6).
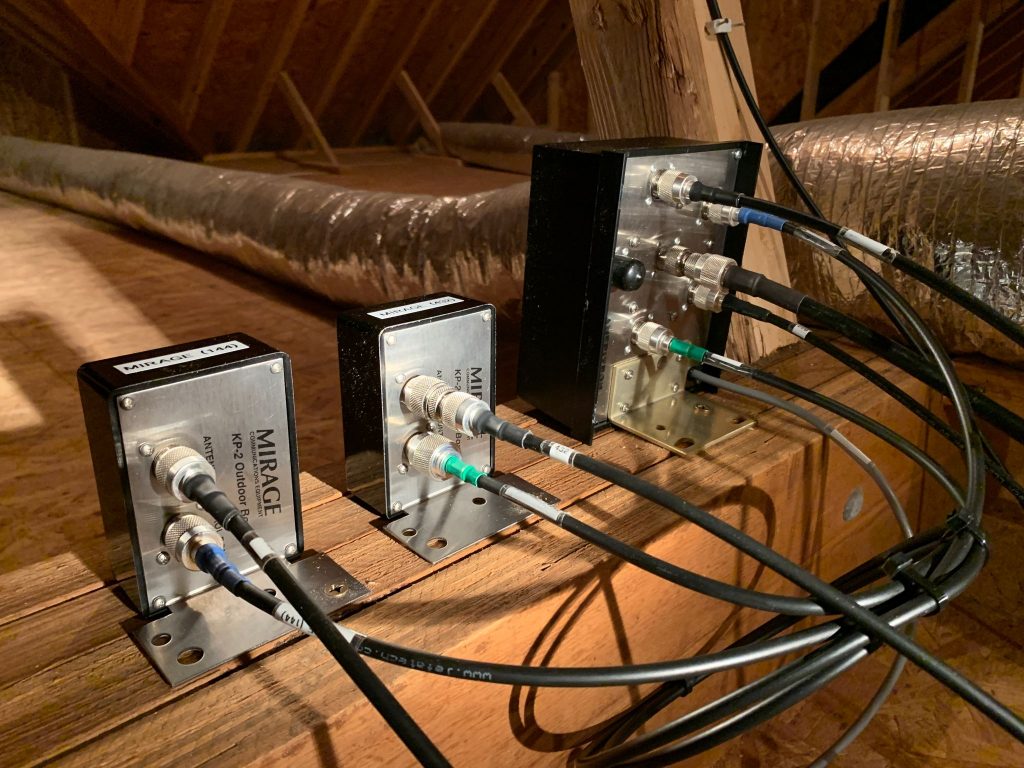
Fig. 5: 144/432 MHz preamps and 5-port remote antenna switch feed the attic Yagi array
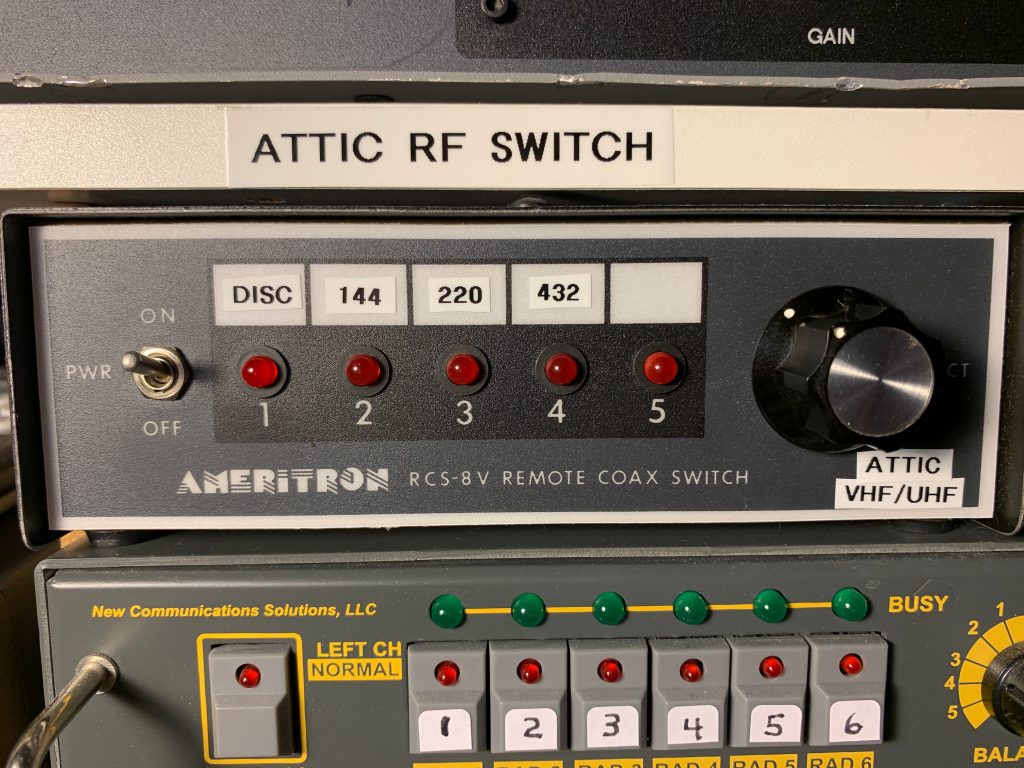
Fig. 6: Remote RF switch control box in the shack chooses which antenna is operational in the attic
Once all the Yagis were bolted in place on the mast, I used my antenna analyzer to adjust their driven elements to provide the best match in the weak-signal portions of each band. I’m sure the radiation patterns are very distorted by the framing and roof materials, the house wiring in the enclosed space, and a nearby HVAC conduit. In addition, the close proximity of the antenna booms to one another probably adds to the RF fog of confusion that must surround the array. I later found that with the beams turned to the southeast, the 6M Yagi’s SWR rose to 2:1, probably because of the director element’s proximity to the insulated HVAC duct when turned in that direction. With attic antennas, it simply is what it is.
But my results so far have been good, at least on 6M. With the original horizontal loop now replaced by the 3-element Yagi, I’ve worked 25 DXCC entities and earned my VUCC (VHF/UHF Century Club) award on that band with more than 150 maidenhead grids confirmed. I’m waiting for the next VHF/UHF contest to give the other Yagis a workout, but I did confirm their operation by listening to nearby beacon stations.
One plus for attic antennas is that they are protected from the effects of the weather and can be easier to work on if changes and maintenance are required, even if the weather outside isn’t great.
Finally, as attic antennas may be physically closer to us, don’t forget to make an RF safety evaluation to ensure your family and nearby neighbors are properly protected, especially if you’re living in a townhouse or condominium. There are numerous online RF exposure calculators that can help you accomplish this important task.
Plans are in the works for the new tower, but until that’s in place I can at least continue to occasionally work VHF/UHF weak-signal stations. So if you are unable to erect any outdoor antennas, you should consider whether an attic antenna will work for you instead.
Overall, antennas are at best a compromise and sometimes are as difficult to install as outdoor antennas. But they can be worth the effort to continue enjoying our great hobby. As we old-timers will tell you, a compromise antenna is always better than no antenna at all!
For more tips, check out this ARRL web page dedicated to ideas and resources for Hams who have limited space for their antennas.