
There is a fine line between maintenance and troubleshooting, whether it’s a Ham station, a car, an audio system, or any bit of technology with several “moving parts.” One often leads to the other in either direction. In this article, I’ll talk about both and provide some guidelines based on my own experiences.
It would be great if a comprehensive flow chart was available showing you how to find or prevent trouble, wouldn’t it? Of course, even simple stations can have so many different types and arrangements of equipmen that it’s not possible to give a step-by-step plan. What you really need is a good tool box full of techniques and methods, then some practice applying them.
One item common to both maintenance and troubleshooting is to keep written records of what you do and what you observe as you go along. This helps keep track of information that might be significant and also helps keep you from going around in circles as you chase a problem. A simple notebook can save many hours! Just take some notes, write down or sketch what’s connected to what, note any interesting readings or values, and record what you change or reconfigure. All of these steps can be important immediately or at some later date. It’s a good habit to develop.
So, it’s really hot outside or rainy or maybe the bands are just closed—why not do a little maintenance in the station? No time like the present, right? Let’s start with the easy stuff.
Clean It, Wipe It
A vacuum cleaner and dust rag can do an amazing amount of good for electronic equipment. If you’re like me, there are a lot of flat surfaces and crevices to collect dust, pet hair, food crumbs, and so on. All of this stuff can collect to the point where it starts to affect heat dissipation and jams or clogs mechanical workings.
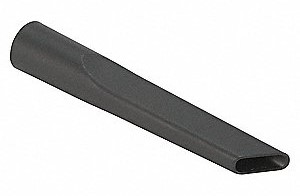
Put the crevice cleaning tool on the vacuum cleaner to suck up all of the loose dirt from your equipment and computer gadgets. Use an old, clean paint brush to knock loose dirt being held by static electricity, dried-up oil, or food bits. As you go, follow up with a wipe from the dust rag to capture the holdouts. Make sure any ventilation holes or slots are clear of dust, particularly the intakes. Try to avoid blowing dust out of or off of equipment since it will just land somewhere else. But if that’s what it takes to get stuff clean, go for it and vacuum extra well elsewhere!
Beverages (the drink, not the antenna) cause their own problems with drips and spills. Assuming you haven’t spilled a whole soda into your radio (it happens) or coffee onto your computer keyboard (that also happens), you should clean off any rings or spots that attract dirt and dust. Once baked on to a finish, these can be hard to get off. Usually, just hot water and elbow grease with a clean dishrag or sponge are enough. Don’t use abrasives or scrubbing pads (metal or plastic) which will mar a painted or polished finish.
What about cleaning sprays or solutions? My recommendation is to not use them. Most aren’t intended for use on electronics and can leave a hard-to-remove residue that causes electronics to malfunction. Here are the three cleaning products I find that work most of the time:
- Clean water—no soap to leave a residue, just gentle rubbing with a damp (but not dripping) cloth followed by a dry cloth to remove any remaining drops or film.
- Isopropyl alcohol—will remove light grease and oil deposits that water smears but doesn’t remove effectively; follow with wiping by a damp cloth
- Lighter fluid—only use on the worst deposits of organic material, be very careful on plastic, and follow with a water or alcohol wipe
Any equipment that generates a lot of heat—tube equipment, amplifiers, power supplies—should be cleaned thoroughly to prevent dust and dirt from baking into or onto the finish. That dust and dirt also make it hotter inside, so you’re doing the electronics a favor, too.
By cleaning your equipment on a regular basis, it will perform better and need less maintenance. If you do have to open a piece of equipment, that is a great opportunity to clean it up inside. My September 2003 QST article, “Amplifier Care and Maintenance” goes into detail about maintaining RF power amplifiers. The Troubleshooting and Maintenance chapter in recent editions of the ARRL Handbook has a lot of information about amplifiers, as well.

As you move things around to clean, put away any papers that sit on or next to equipment. Paper is a great insulator and can easily block air flow. Any user manuals or operating notes should be put away for future reference. Make sure you can find the manuals for your gear, too. It’s better to have that job done before you’re trying to find a manual in a hurry!
Tighten, Wiggle, and Seat
As a person seeing their first “wireless” station is said to have remarked, “I’ve never seen so many wires in all my life!” Even simple stations have numerous cables and wires connecting the various pieces of equipment and the ever-collecting set of gadgets connected to them. As you might expect, these can cause trouble, so give them some maintenance time, too.
Coaxial connectors, particularly threaded versions like PL-259s, can work loose over time because of temperature cycling or vibration. This can lead to noise, spurious signals, intermittent SWR problems, and other issues that can be difficult to find. Grab a pair of pliers (the channel-jaw models work well) and make sure each RF connector is well-seated and tight on its mating receptacle. (Be gentle with miniature SMA connectors!) It doesn’t have to be much more than finger-tight. Also check bayonet-style BNC or friction fit RCA/phono connectors to be sure they are tightly seated.
Ground connections have a way of working loose as equipment is moved around. Check the connections at the equipment and at the ground bus or terminal. Give the wire a good wiggle to see if it is really as tight as you think. Make sure any corrosion is removed with a wire brush.
Keep on wiggling the various audio, data, and control cables. Make sure each connector is firmly seated in its mating connector. Are any of the cables themselves loose in the connector? Consider replacing or reworking that connector. If you disconnect the cable, give the connector a close inspection for corrosion or loose pieces such as a partially unscrewed shell.
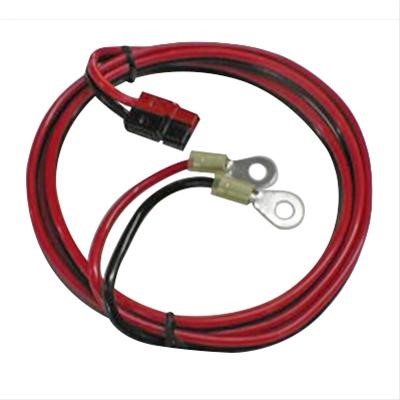
Connectors for DC power should be clean and snug so that contact resistance is as low as possible. This prevents voltage drops under load that can cause equipment to “act funny” when transmitting, for example. With the equipment powered up, wiggle the power connectors at both the equipment and the power supply while watching for power drop-outs. Loosely crimped terminals (ring, fork, quick-disconnect, etc.) can work loose if mechanically stressed or overheated. Replace them if the wire is loose at all.
Powerpole connectors have become very popular, so be extra sure their contacts are securely inserted in the housing. Detach and reattach the connectors a couple of times to let the natural contact wiping process clear any dirt or oxidation. If the connectors form a splice between two cables, consider using a cable tie to hold the connection together.
What’s the Problem?
Let’s say the station had some kind of problem and you’ve done your maintenance, but the problem still seems to be there. Now you’re in the troubleshooting phase! Start by carefully describing the problem and writing it down. Sometimes just the act of thinking clearly about the problem is enough to spark the inspiration to realize what the cause is. Specifically:
- What behavior did you notice as a problem?
- Is it continuous or intermittent?
- Does it only occur…
- On certain bands or modes
- At certain times
- After a period of operating or immediately
- When a combination of equipment is used
These pieces of information, and any other circumstances you can think of, form a good description of your starting point. When you get confused (it happens to the best of techs!) or forget something, this description will help you return to the starting point, verify the problem still exists as described, and start anew.
Made Any Recent Changes?
There is an engineering saying, “When the system stops working, remove the last two improvements.” It is surprising how often this works! This is also why keeping a record of changes (adding or removing equipment, changing layout, rewiring something) is so important. If you have made changes, try to put things back as they were, one piece of gear or connection at a time. Updating computer or equipment firmware is another frequent source of problems. Carefully check to see if the problem is still present or if it has changed. If the problem remains, return the station to its current configuration and keep hunting.
Check the Power
Power sources are often assumed to be okay—after all, the ON light is on, isn’t it? But they can suffer from all kinds of trouble: overloading, loose connections (at the supply or at the equipment), voltage mis-adjustments, overheating. It’s usually simple to check output voltage with various combinations of loads: attach voltmeter probes to the supply output so you can see the meter as you turn things on and off, transmit, etc. Power supplies should be warm but not hot, should not produce any “hot component” smells, and have a steady output voltage up to their rated load. Make sure the power supply or supplies are working properly because, “If the power supply’s not happy, no equipment is happy!”
Switch and Control Settings
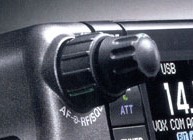
You might not be surprised to learn that many “dead FM radio” repairs consist of nothing more than re-setting the squelch level! The squelch knob is often easy to bump unintentionally on small radios or when it is concentric with another control as shown below. Suddenly, your radio “can’t hear!” The same can be true for many other controls or switches; if they are easy to change accidentally, sooner or later they will be. Your radio’s display may have indicators that show important settings—look at them carefully to be sure what’s ON and OFF.
Elsewhere in the station, check to be sure antenna switches and tuners are switched to use the right antenna and the tuning controls are set correctly. (This is why you write down antenna tuner settings for each antenna and band.) Radios and their accessories have many sub-miniature switches, sliders, and rotary controls, so it’s very easy to have one set incorrectly and cause misbehavior.
Are the Controllers Controlling?
Interfaces are common between a computer or radio and automated accessories like band-switched filters, antenna switches, rotators, etc. Depending on the controller, are its status indicators showing normal operation? Can you tell if the controller is making changes as you expect or when you tell it to do something? Does power cycling have an effect? Depending on what is being controlled, a problem with a controller can appear as problems with the controlled equipment.
Divide and Conquer
The next step is to isolate the problem to a piece of equipment or a set of equipment, such as:
- Antenna System: This consists of everything from the transmitter output of the transceiver or amplifier to the antenna. Start by connecting a dummy load to the transmitted signal output. If the equipment is working normally that way, it’s an indication the problem is in the antenna system.
- Transmitter: Although transceivers combine transmit/receive functions, there is usually a separate signal chain for high-power transmitted signals. Relays, switches, amplifier stages, and amplifying devices can all cause their own problems. These problems are usually associated with insufficient power output, poor signal quality, or overheating. Keep trying to make your problem description more and more specific until you have pinned down where it might be in the transmit signal chain.
- Receiver: Similar to the transmit signal chain, a receive signal chain exists for low-level signals. This path goes through different parts of a transceiver and may involve a standalone accessory such as a signal processor or filter. Problems in the receive signal chain typically involve noise or filtering problems, poor audio, or inability to decode incoming signals. As with transmit problems, work with the controls and switches until you have a better idea of what part of the receiver has the problem.
- Computer Audio Interfaces: These are used for many digital modes and range from passive transformer signal isolators to standalone sound cards. Aside from checking the configuration settings and all cables, the best way to isolate problems to these devices is to install a known-good substitute to see if the problem persists.
- Computer Control Interfaces: See the section above on controllers. Be sure the computer is getting the right information to operate the control functions and is configured properly both for its control inputs and outputs.
Be Resourceful
Nobody expects you to think things through and solve problems in complete isolation—this isn’t a closed-book exam! Take advantage of the collective knowledge we all share as Ham radio operators.
- User manuals: These often have troubleshooting sections, show default and “normal” settings of all controls for various functions, and tell you how to return a piece of equipment to “factory” or “default” settings.
- Troubleshooting guides: The ARRL Handbook and the ARRL Antenna Book have extensive chapters on troubleshooting. Articles in magazines and online often discuss repair techniques, especially for vintage equipment.
- Internet searches: You are probably not the only person to experience a particular problem. Use internet search engines, user’s groups, email reflectors, and social media to look for solutions or ask for help. (Check online archives for possible solutions first!)
- Clubs and friends: The value of your local Hams can be amazing. Maybe they have some test equipment or experience of value. Sometimes, it’s just useful to talk things over. Many problems have been solved with, “Have you checked…?”
Some D(arn)ed Thing (SDT)
Finally, you’ve heard of SDRs, but how about SDTs? As every troubleshooter eventually discovers, some problems just aren’t found through careful step-by-step analysis and testing because their cause is something unexpected. For example, an early computer was found to not operate properly because a moth had gotten stuck between relay contacts! I’m sure that wasn’t in any test manual. The solution for SDTs is to keep an open mind, a watchful eye, and to listen to that little voice in your head saying, “Hey, that looks funny!” You’ll develop a great set of stories along the way to share with your friends that begin, “You won’t believe this!”