
Today’s vehicles aren’t very ham radio-friendly. The days of having a big dash with empty space underneath are gone, so you need to get a bit more creative.
If you’re a diehard fan of mobile operation, the first thing you probably do when shopping for a vehicle is to examine the cockpit. Are there any cubbies where you can stash a remote head? Is the lower portion of the dash accessible for running antenna and power wires? Is the console a possibility for a cup holder or side mounts?
The answers to these questions vary from vehicle to vehicle depending on the layout and space available. There are also newer wrinkles like driver-assist and safety devices to consider. You don’t want to block a camera or sensor, nor do you want to accidentally deploy an airbag while running wires.
Making it Work
Over the years manufacturers have adapted their radios for mobile operation. Probably the best solutions they’ve produced thus far are smaller radios and the remote head. Remote head mounting lets you detach the control panel from the radio and mount it up on the dash where you can easily view it while driving. You can mount the rest of the radio under a seat or even in your trunk or cargo area. The best examples of these are low-profile control heads with enough cabling to reach the trunk of the average car and the ability to reattach to the radio so it can function as a base or portable.
Safety is the primary consideration. Your installation should be planned and executed to decrease distraction as much as possible. This means avoiding locations which interfere with vehicle controls and systems. Also, take care to wire the radio correctly. Though running a pair of #10 AWG wires through the firewall is a pain, it is much more reliable and safer than using the vehicle’s existing wiring at the fuse panel or the accessory socket.
Follow this rule for every mobile installation—if it is loose, bolt it down! Contrary to popular belief, there is always a place to properly screw down radios and/or remote heads. Avoid Velcro, double-sided sticky tape, suction cups, bungee cords, and magnets whenever possible.
Main Unit Install
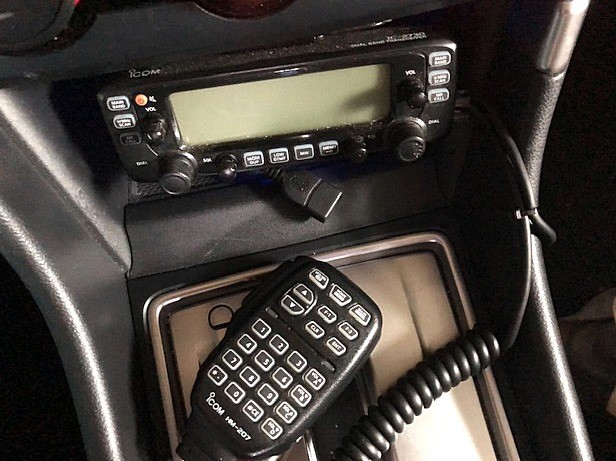
When I finally chose my SUV three years ago, it had a cubby that was the perfect size for a remote head, with a little room to spare. In the back were two USB ports, but it was easy enough to run an extension to the front so they could still be used. The remote was mounted with a wide L-bracket and a speaker was mounted to the front of the console. I fished a heavy-duty power cable and the remote line under the carpet to the cargo area.
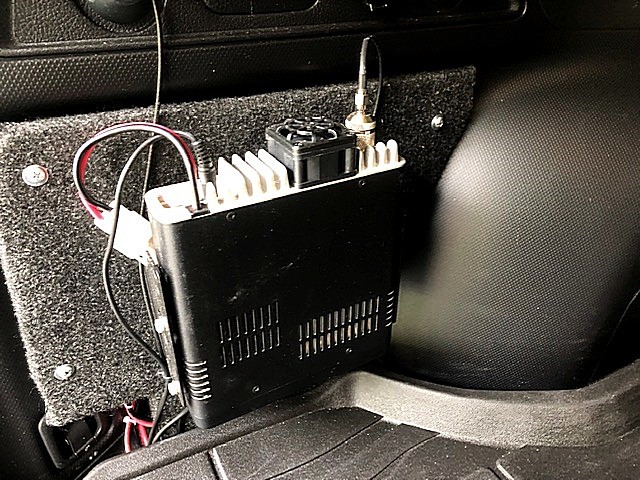
A support base was constructed out of plywood covered with scrap carpet. The mounting bracket was added and the whole assembly was attached to the left side panel with screws and anchors. Finally, the IC-2730 main unit was installed and the wires tucked in behind the base. As you’ll notice in the photo, the radio and fan are not blocked, providing airflow around the unit. Remember to keep it cool when you choose your mounting location.
Another popular mounting location for remotable transceivers is under the front passenger seat. But be careful—it’s common for the side airbags or their impact sensors to be mounted in the vicinity of the seat’s framework, along with their secured connections. There is a small chance of deploying an airbag if these connections are mishandled.
Back seats are also an option, especially with pickups and minivans. For example, on a Ford F-150 the rear seat folds up to give you access to the floor. You can do your installation and fold down the seat to protect the radios and still have room for additional passengers.
Choose Your Mounting
Don’t just buy a random mount and then try to figure out how or where to attach it. Purchase a suitable mount to fit your specific installation. The mounting location should allow your radio or remote head to be within easy reach and easily viewable. Or you can take the DIY route like I did.
Look to see if the mount has an AMPS plate to attach your remote head. The AMPS hole pattern has become an industry standard configuration, consisting of four holes located in a rectangular pattern spaced at 1.181″ x 1.496″ (30mm x 38mm). If it isn’t included, be sure to purchase one.
Here is a sampling of mounts that will work in a variety of situations:
A popular option to mount a ham radio remote head or small VHF/UHF mobile is the gooseneck floor mount, which attaches to the seat bolt on the floor. The flexible gooseneck can be adjusted to place the remote head near console level. Attaching one of these mounts is fairly easy using a wrench. Simply loosen the seat bolt, slide the claw at the end of the mount under the head of the seat bolt, and tighten the bolt securely.
Similar to the gooseneck, a pedestal mount has a rigid shaft with adjustable pivot points. The mounting base attaches to a reasonably flat surface such as a console, dash, or floor.
PanaVise makes a VSM (Vehicle-Specific Mount) that fits between the radio and dash trim. It’s basically a metal angle bracket. They are very sturdy if installed correctly but require at least partial removal of the radio to install.
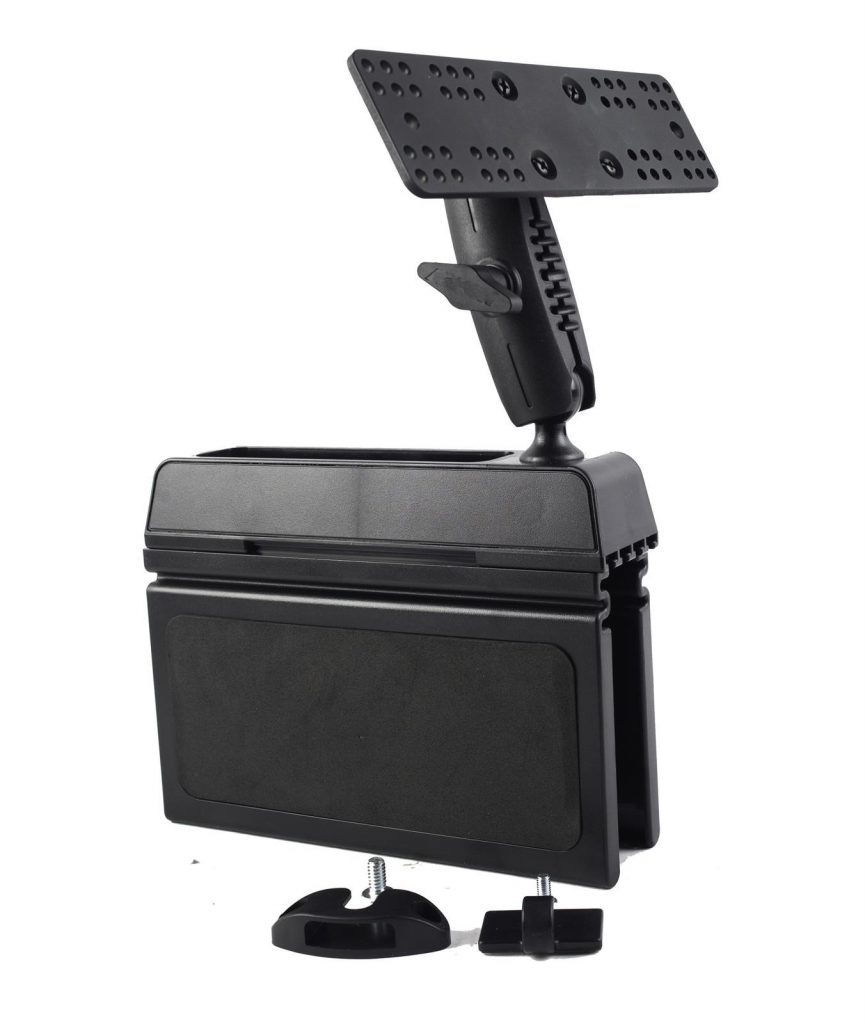
Another solution for a remote head is using a cup holder mount. Twist the assembly and the bottom expands or contracts to fit most size cup holders. These work well in traditional cup holders on the console but not very well in cup holders that pull out of the dash–you need a solid bottom for stability. The mount stands above the cup holder and has either a gooseneck or a ball mount that is adjustable for the best angle.
Using a similar friction fit principle, the wedge mount is an easy way to install HTs and remote heads. To install, you slip the mount between the seat and console (you might remember trying this with the entire radio!). It’s flexible with a ball and socket support arm that holds the extension plate, which can be adjusted for the best viewing angle.
Location
When you install your mobile rig in your vehicle, keep it out of direct sunlight when possible. Also, the rule of out of sight, out of mind applies to avoid attracting the attention of those who might want to make your radio theirs. Take measures to make your installation less conspicuous.