
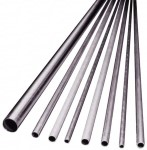
Next to wires, antennas made of aluminum tubing and rod are the most common type of amateur radio antenna construction. There is a wide range of high-quality aluminum alloy available, especially the popular T6061 material, that is just right for antenna building. Sooner or later, you will get to build one yourself, so why not learn some helpful tips to get started? While there is no substitute for a seasoned mentor to help you with your first project or two, don’t be too shy about giving it a try. We’ll assume you’re building from scratch and include tips for assembling commercial antennas along the way.
Homebrew antennas, homebrew antennas
Ain’t nothing in the world like homebrew antennas
Just two things that money can’t buy
That’s free junk and homebrew antennas
(With apologies to Guy Clark and “Homegrown Tomatoes”)
Building from Scratch
Perhaps you have downloaded a design or have the plans from a book or website. You can buy aluminum from a local metals dealer or a company like DX Engineering. Also check with local hams to see if they have what you need in their “bone yards” of old antenna parts. Many a VHF or high-band HF Yagi has been constructed from parts from a defunct HF beam or vertical!
Inspect the pieces carefully. While a minor bend or nick is not usually a problem, you don’t want pieces that are dimpled, crimped, or cracked. Be wary of tubing with swaged ends narrower than the main diameter since that will reduce the size of tubing that can be inserted into the tube. It may be best to cut off swaged sections entirely. Clean the materials using a non-abrasive plastic cleaning pad. Steel wool will leave small bits of steel in the surface of aluminum to rust or pit. Blow or wash out any “stuff” in hollow tubing.
Measure Twice, Cut Once
The best advice ever! Aluminum is expensive! Once you have your stock in hand, carefully check the diameter and wall thickness to be sure you have the right stuff. After verifying that you actually have the material you need, measure and cut a test length for one section. Then check to see what length it actually turns out to be. If there is a meaningful difference between the length you wanted and the length you wound up with, now is the time to figure out why. Maybe your measuring device isn’t accurate? Tape measures are notorious for the end hook being loose and moving on the tape. Whatever the cause, either obtain a more accurate measuring device or take the error into account on all future measurements.
Don’t Get the Bends
Whatever you use to hold, drill, or cut tubing, don’t deform it so it becomes out of round. If that happens, it won’t telescope with round tubing or rod. Rod that gets bent is very hard to straighten out such that it will still slide into a straight tube. Store and handle the materials carefully.
Cutting and Sawing
There are lots of ways to cut tubing or rod: by hand with a hacksaw or tubing cutter, metal-cutoff wheel in a handheld drill, band saw, metal-cutting blade in a table saw, and so on. Just search for “how to cut aluminum” on the internet and you’ll find plenty of advice and videos. The most important tips are:
- Use a clamp or jig to hold what you’re cutting so it can’t move
- Set up the cutting tool to cut the material square across its diameter
- Don’t force the cutting tool. Take your time and cut at the right rate for the saw blade
Drilling Tubing
When drilling round tubing, make the hole directly across the tubing diameter. That can be very hard to do consistently using a hand drill without using some kind of jig or clamp for both the tubing and the drill. If you like building antennas, you should really invest in or borrow a small drill press and a couple of machine vises that can be clamped to the press table. Even for a few holes, using a drill press makes the process easy and clean. Here’s a good introduction to the process.
For the drill bits, make sure they are sharp and have a variety of sizes. (Don’t you have a birthday coming up?) Use the right size specified for the screws or other hardware being used. A hole that is too large will elongate as the antenna flexes in the wind—this can lead to failure, particularly on big antennas. A too-small hole will be hard to thread or might damage screw threads. Use and follow a table of drill sizes for the hardware used.
When you are drilling small tubing or rod, the drill bit can “walk” because of the slope of the tubing or from a small misalignment with the tube’s center. Use a center punch and put a small pit in the tubing exactly where you want the hole. Then, use a small bit with light pressure to get the hole started. If you are drilling heavier material like a boom-to-mast plate, drill a small pilot hole to guide the larger bit through the material and prevent an off-center hole.
How hard should you press? Aluminum is a soft metal, so you won’t have to put a lot of pressure on the bit. Let the bit cut its way through the material, don’t push it through. If the bit is generating chips, the drill is turning too fast and will “chatter,” which creates an out-of-round hole. Turning a large bit too slowly can allow the bit to “grab” and twist, even bend, the material. Experiment with some scrap and find a speed and pressure that generate curls instead of chips.
Burrs and Deburring
No matter what type of drill you use, you’re probably going to have some burrs around the hole on both surfaces. You have to remove the burrs if the tubing is expected to telescope with a larger or smaller tube or rod.
Getting the burrs off the outside surface or at the end of a tube or rod is fairly easy since you can use a common deburring tool, a countersink or drill bit several times the hole diameter, or a round file. That will clean up the hole and does not require a power tool. Twisting a countersink or drill bit by hand keeps them from biting into the hole.

Clearing the burrs from the inside of a hole in tubing is a different story. Cogsdill, Noga, and other specialty deburring tools will do the job on both surfaces but can be expensive if you need different sizes.
If you have a drill bit that is the same size as the tubing going into the inside of the tubing, you can run it into the tube and knock off the burrs. You might need to deburr both inside and outside a couple of times if the burrs bend back into the hole. Deburring holes in larger tubing can be done with a half-round file. Editor’s Note: The DX Engineering Tube Deburring Tool Kit comes with a small hand-deburring tool, half-round file, and two reamers for deburring tubing sizes from 3/8″ to 2-1/8″ O.D. and 1-7/8″ to 3-1/2″ O.D.
Warning—do not force metal tubes together if there are burrs or chips present. The mating surfaces of the tubes or rod must be clean and free of metal bits or they will jam between the surfaces. This makes the joint very difficult to disassemble! The tubing or rod should slide in and out without binding.
Slotted Tubing and Hose Clamps
Many antennas use stainless-steel hose clamps to clamp nested tubing together. Slotted tubing has one or two narrow slots cut into the end of the outer tubing, about 1.5 to 2 tubing diameters long.
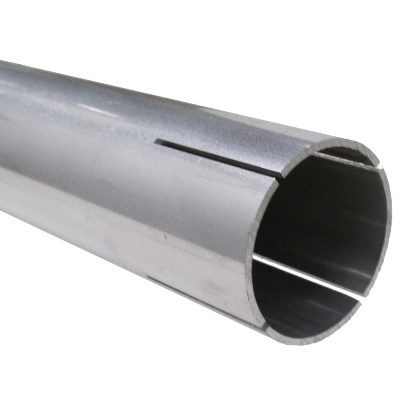
With the inner tubing inserted, the hose clamp compresses the outer tube against inner tube. This technique is simple, inexpensive, and can be pretty reliable with the following caveats:
- Clean the slot of burrs inside and out to ensure maximum clamping area
- Use a hose clamp in the middle of its size range so the free end does not stick out
- Orient the hose clamp so that the screw is at halfway between the slots
- Let the clamps sit overnight and then retighten before installing the antenna
Some recommend wrapping the hose clamp with electrical tape to control the free end and help prevent the clamp from snagging on ropes or wires.
Screws and Locknuts
Although it is more expensive, stainless-steel hardware should be used to prevent corrosion. Plated hardware will rust quickly and may be quite difficult to get apart.
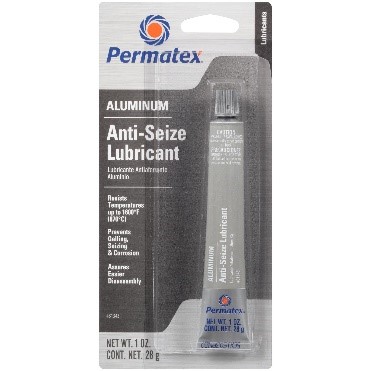
On larger sizes of stainless-steel screws (like U-bolts), use an anti-seize compound such as Permatex 80078 or 81313 to keep the threads from galling (a type of surface-to-surface adhesion). A small tube will suffice for a few antennas.
On small tubes and rods, a sheet metal screw may be sufficient to hold tubing or rod together. Machine screws, going all the way through the tube, are better on larger tubing sizes. A pair of machine screws at right angles is a very robust connection.
How tight is tight? The goal is to tighten the threads until they begin to deform. (Not so much that the tubing deforms or the threads strip!) That creates enough tension to keep the hardware from loosening. A lockwasher adds to and maintains the tension as a kind of spring. For medium and small aluminum pieces, an external-tooth lockwasher is recommended to maintain mechanical and electrical connections. The common split-O lockwasher loses most of its spring force when completely compressed. Another common technique is to use a pair of nuts (double-nutting) on larger tubing to prevent loosening.
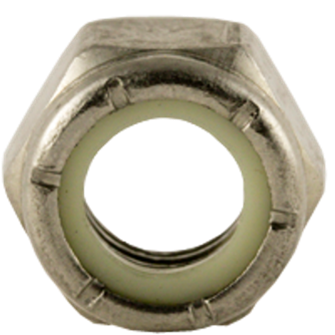
Nylon-insert Nyloc nuts are another common solution. If you are concerned about the nylon degrading from being exposed to sunlight, install the nuts where they will face the ground. Or apply a thin coat of liquid electrical tape after the nut is seated—it will peel off if the nut has to be removed. These nuts are only supposed to be used once for the plastic to provide the full holding ability. Use new ones on all construction and rebuilding.
Finally, a thread locking compound will hold a nut or screw in place against vibration or thermal cycling. Both Locktite and Permatex make several varieties. The “medium” grade compounds are recommended and still allow the hardware to be removed.
Rivets
Another popular method of holding tubes and sheets together is pop-riveting. The rivet is aluminum with a steel mandrel in the middle. The rivet is placed in a hole through the pieces to be joined with the outer flange against the workpiece. The riveting tool—about the size of a large pair of pliers—pulls the mandrel into the rivet, spreading it out and compressing it against the back surface until the mandrel snaps off at the proper force for the rivet.
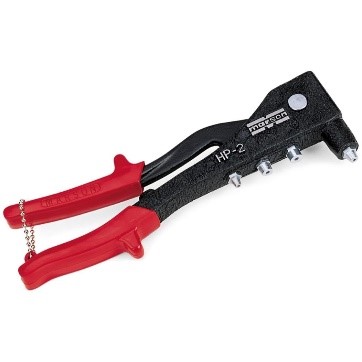
The pop-riveting process is illustrated here.
You have to use the right rivet depth and diameter for the job. Your hardware store or supplier should have the necessary information for you to make a selection. Most amateur antennas use 1/8″ or 3/16″ rivets. Don’t scrimp on the rivet gun, either. Even a modest antenna will require dozens of rivets, and a cheap gun will make the job harder and your hands sore! For larger rivets, use a large, two-handled tool about the size of a hedge clipper because a hand-squeezed tool won’t supply the necessary force to do the job right.
Assembling the Pieces
Once you have all the pieces and hardware, the process of assembly is about the same for commercial and homemade antennas:
- Lay out the pieces and verify you have all of them and they are all the expected sizes
- Keep track of the various small hardware in pans, cups, or bags
- Use a thin coating of anti-corrosion/anti-oxidation compound on all tubing joints and between dissimilar metals
- After assembly, let the antenna day/night cycle outside, then retighten all hardware
You might want to assemble the antenna on sawhorses or a work support. Working on the ground gets old fast—your knees and back will get sore—so elevate the antenna to where it’s comfortable. Work over a hard, clean surface, not grass or rugs, so that when (not if) you drop a small part, you won’t have to hunt for it. (Hint—a magnet will find ferrous hardware otherwise lost in grass or shaggy carpet.)
One of the best ways to build a Yagi is to secure a piece of mast material in a vertical position, then mount the boom on it at a convenient height and add the elements. The antenna will probably be very unbalanced for part of the process, so make sure the mast can’t tip over. If the mast can swivel, you can turn the antenna and work on different parts without having to walk around it. If you’re going to build a lot of antennas, burying a sleeve in the ground to seat the mast simplifies setup considerably.
Before inserting a piece of tubing into a telescoping joint, give it a thin coating of anti-oxidation compound like SS-30 or Penetrox on the nested length. You don’t need a lot. With the tubing inserted, you should see a small bead of compound formed at the junction of the tubes. Wipe off any excess with a rag. Almost any anti-oxidation or anti-corrosion compound will do. It prevents the formation of oxide between the tubes that can create an insulating layer and make it almost impossible to get the sections apart.
Tuning a VHF or UHF antenna can be done a few feet above the ground. Larger HF antennas need to be away from the ground during tuning but doing it on top of the tower can be difficult. One way to get around this problem is to orient the antenna vertically, pointing up with the rear element 6 to 10 feet above the ground to reduce the detuning effect of ground. Another way is to suspend the antenna from a rope between two supports so that the antenna is 10 or 20 feet above the ground. Make it easy to lower the antenna for adjustments.
Finally, water…it will get into the tubing, no matter how you try to seal it up. If you install plastic caps on the element or boom tubes, they will capture the water that gets in or condenses inside the tube. Slowly the water fills the tubes, which causes its own problem. It’s best to leave tubing open. If you are concerned about noise from wind blowing across the open end or insects getting in, put stainless-steel wool or a scrubbing pad in the tubing. It will allow drainage while keeping all but the littlest stuff out.
At Last
Finally, you’ve built your own antenna, tuned it up, and are making QSOs with it—congratulations! Antenna design and building are two of ham radio’s great features. Only a few other FCC-licensed services allow its licensees to do this. It’s a great way to gain “radio know-how,” and it’s part of what makes ham radio so valuable.