
A DX Engineering customer/technical support specialist looks back at his mobile radio installation that is still going strong nine years later.
***
Since my early days of playing with CB radio, I have always had a mobile station. Thank goodness they have improved over the years. My knowledge of electrical theory and appreciation of the install aesthetics have grown, so my techniques have had to grow as well.
It used to be that vehicles had plenty of compartment space as well as dash real estate to install mobile transceivers. You could hold a square dance in the cab of my 1973 Ford F-100. With today’s vehicle manufacturers trying to fit as much technology and safety as possible in the passenger compartment, there is little room for ham radio transceivers, CBs, or GMRS radios.
So, what do you do?
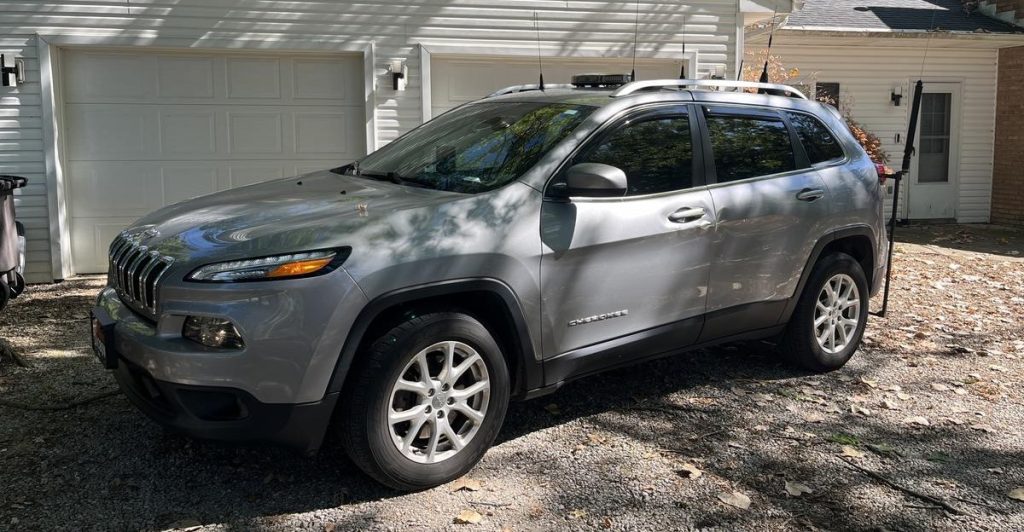
Here is the mobile radio installation process I employed in my 2016 Jeep Cherokee Latitude.
I was going to mount a Yaesu FTM-300DR, a Yaesu FT-857D, and a commercial Kenwood NX-5700, which would also control an NX-5800 RF deck. This would allow me access to amateur HF/VHF/UHF bands as well as the public safety, Civil Air Patrol and Military Auxiliary Radio Service (MARS) frequencies I needed. This configuration also kept everything “legal” by using radios that were the type accepted for what I was using them for.
First, I recommend laying out your whole project. Don’t just start drilling holes and bolting mounting brackets in place. This step may take a couple of days to get it just right, but in the end will provide a much cleaner outcome. In my case I have three remote heads mounted on my dash that control four RF decks mounted in the spare tire compartment. This took about a week of planning to get it the way I wanted it.
I would stack them up and see how they would look and fit. Once I had a workable solution, I used Velcro® dots to hold them together until I had a mounting bracket solution—this was another issue that nearly drove me batty. The adhesive Velcro would not stay put. Body molding tape worked great until my car sat in the parking lot at work where I came out to find my radios on the floor and the tape turned to balls of goo.
In 2016 the world of custom vehicle mounts was just emerging and there were no mounts for the dash of my Cherokee, so I used a piece of bar stock and fabricated my own. I carefully removed the trim ring around the radio screen and found a piece of metal on which to secure the mount. I formed the mount so that it emerged from the dash where the trim ring mated to an adjoining trim ring. It did require a little “shaving” to accommodate the mount, but all was good in the end.
The bottom control head was secured to the mount, and the subsequent two heads were mounted on top of that one with a small piece of bar stock running vertically behind the heads. A small hole had to be drilled in the trim ring to allow for control cable passage, but it was completely behind the control heads, so it wasn’t visible. With that, the dash work was complete.

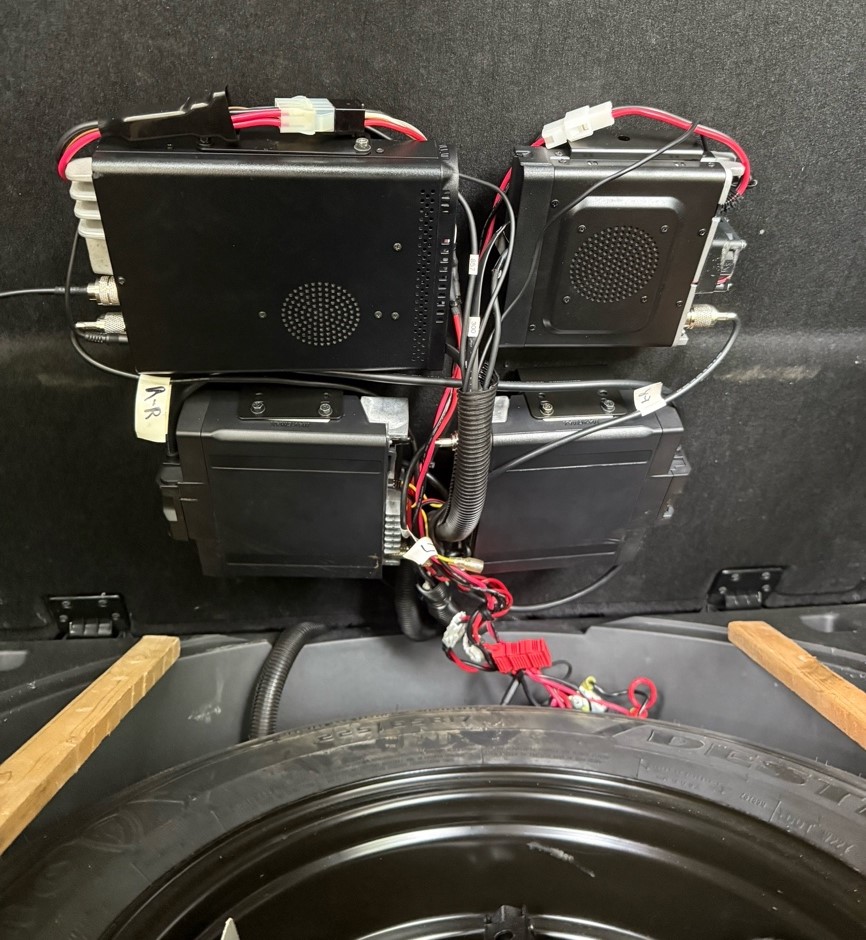
Now to mount the RF decks: I have a full-sized spare mounted beneath the rear cargo area floor, and the entire wheel area is open. I slowly wedged my arm into the spare tire area and traced the inside of the spare tire wheel onto the underside of the cargo area floor. I now knew that if I kept the RF decks inside that circle, they would lower into the void of the wheel. I was able to fit them all inside that circle. Now if I need access to the RF decks, I just raise the floor and there they are.
On to the antennas: I figured I was going to need a total of five antennas. For the FTM-300 and the FT-857D I chose two Comet VHF/UHF 2x4SRNMOs and Comet mobile mount cable assemblies. For the FT-857, I chose the Yaesu ATAS-120A Auto Active Tuning Antenna, which provides 40-6M coverage. On the commercial side I went with a Larsen LMR antenna, which was band-specific for the NX-5700 and NX-5800. I tried various lip mounts and magnet mounts without much luck. I finally decided to “drill, baby, drill!”
The comet and Larsen antennas were mounted on the four corners of the roof, and all cabling was run to the respective C pillar where it was run down into the spare tire compartment. The ATAS mount was a bit more challenging as this antenna requires a strong ground. I opted to fabricate a mount for this that would be mounted right to the frame. It would allow the cable to enter behind the left taillight and drop into the spare tire compartment.
The last step was to provide power and grounding. I ran an 8AWG wire from the positive and negative terminal of the battery all the way back to the spare tire compartment with a circuit breaker on the positive lead under the hood. Let me pause here for a minute and address cable runs.
To run the cabling from the spare tire compartment to the front of the vehicle, I looked at all possibilities. I decided to split the number of cables in half and run them on either side. I pulled the threshold panels on all four doors to allow access. I was able to tuck the cables under trip panels and under carpet all the way to the dash. I made sure the cables were flat and not crossing over one another when replacing the threshold panels. The wires were then run under the dash and came through the hole in the trim ring behind the control heads.
Okay, now back to power connections. The positive lead from the battery was connected to a fuse block mounted to the side wall of the spare tire compartment, and each RF deck was then connected to the fuse block. The negative lead was connected to a ground bus bar mounted to the side wall of the spare tire compartment and again, each RF deck was connected to the bus bar.
It should be noted that I did have a bit of “noise” in the FT-857D on HF. I applied ferrites to the power lines as well as the wiring harness of the alternator and fuel pump. In my experience, the fuel pump is usually the culprit. The noise was abated with these ferrites.
Overall, it was a ton of work. I figured I spent about 40-50 hours from start to finish. There is a huge benefit to doing things the right way and not just the easy way. It has been almost nine years and 110,000 miles since the installation and it’s still going strong. I would encourage you to invest the time and effort into using solid installation techniques. You will be pleased by the results.
Here are a few other applicable mobile radio installation products available at DX Engineering:
- Summit Racing Pico Add-A-Circuit Fuse Holder
- Comet 3D5M Standard Mobile Lip Mount Cable Assembly
- DX Engineering Zip Cord Power Wire
- Gentle Pry Tool Kit
For more great ideas for your mobile radio installation, watch this video on the installation of three transceivers in the Summit Racing/DX Engineering “Roamin’ Gladiator” Jeep project vehicle.