
Uh-oh, the radio’s broken! It’s either doing something it’s not supposed to or not doing something it’s supposed to. The natural response will always be to change a few things, wiggle some stuff, and turn the power off and on. But what if it still doesn’t work? In this article, I’ll go through some troubleshooting steps for solid-state radios that will help you find the problem or get to the point where you need to “open the hood.”
If you do need to take the cover off, that’s beyond the scope of this article and gets into detailed electronic repair; I’ll leave that for the seasoned technicians. Whatever you do, though, as you go through the troubleshooting process, keep notes at each step of what you did and what the radio does in response.
Before You Begin
Think about what, exactly, makes you believe the radio is “broken”—what is it doing or not doing? It makes a difference whether the problem happens continuously or intermittently or after the power has been on for a while. Or maybe the problem goes away after the radio has been on for a while. Think about what the problem is and when it occurs, and then write that down. This is your starting point whether you are the troubleshooter or a repair tech.
Think about any recent changes or events that might have affected the radio. Is there a new accessory in the station? Did a cable or connector get changed or replaced? Did you add a new cable or take one away? Did equipment get moved around, even temporarily? Was there a power outage or severe weather recently? What you’re looking for is “It worked before [something] and now it doesn’t.” Consider what consequences that something might have had and check those out.
When a radio gets moved around or things get disconnected and plugged back in, you might have forgotten to reconnect something. It’s also very easy to get a cable either partially reconnected or mis-connected. Before deciding the radio is at fault, be sure each cable and connector is where it’s supposed to be and fully attached. Cables, wires, and connectors can also fail when they are pulled and pushed—give them a good visual inspection, too.
Handheld radios can be easy to accidentally mis-configure because they are small and can be jammed in a pants or pack pocket. On the smaller models, buttons can be pressed unintentionally just by picking up the radio! Check to be sure the radio hasn’t been accidentally locked so that it can turn on and off but nothing else can be changed—a LOCK or key icon is usually displayed when locked.

Before you go much further, it is sometimes useful to visit the internet for advice. Use a search engine to look for reports of similar problems with your radio. Search for “TS-440 display dots,” for example— you’ll get a number of links to causes and solutions for this well-known problem with a popular radio. If there is a user’s group for your radio or a manufacturer’s support forum, search them for previous messages about similar problems. This is called “checking the archives,” and it is polite to look there before asking a question that has been asked and answered before. If specific answers are available that sound possible, check them out on your radio. If that solves the problem, don’t forget to say thanks. If you find a similar problem, share your problem and solution with the group.
Check Input Power
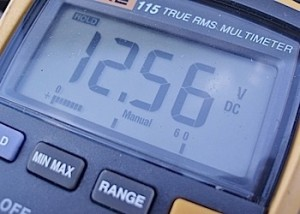
First, does the radio turn on at all or does it remain turned off? If it stays off, you need to back up a step to be sure that the power supply is on and that it has the right output voltage as we discussed in the previous OnAllBands article, “Maintaining and Troubleshooting Your Station.” If the supply is OK, use an ohmmeter to check any fuses in the power cable itself, looking carefully at the fuse holder for burned, corroded, or loose connections. Assuming the fuses are OK, is there power at the radio when the supply is turned on? Make sure the supply and cable are OK before going any further.
With power present at the power connector, if the radio does not turn on, remove power and use your sense of smell—do you smell any overheating or burnt components? If so, stop right there. Find the source of that smell and fix the problem or get ready to send the radio to a repair shop. Continuing to apply power to a damaged radio could make the problem a lot worse (and more expensive).
Not Powering Up
Start by removing all external power—not just turning off the radio from the front panel, but actually disconnecting the power cable. For handheld radios, remove the battery pack. Let the radio sit for a few minutes without external power. This lets any internal filter capacitors fully discharge and all circuits get to a completely power-off state. Reconnect power or reinstall the battery pack and let’s begin.
Use the power switch to turn the radio on. If it doesn’t turn on and all displays and indicators remain off, shake it gently. Watch the front panel to see if any indicators or displays flicker on and off. What you’re checking for is a loose cable or board inside that can be fixed by carefully reseating it in a connector. While you’re shaking the radio, listen for any loose hardware. Checking for loose cables and hardware inside the radio is worth trying before sending the radio in for repairs, but only if the radio cover is easy to remove and reinstall. For handheld radios, that’s rarely the case and not for beginners. If the radio remains thoroughly off at this point, note what you’ve done and get ready to have the radio serviced.
Powers Up, But Unresponsive
If the radio turns on, does it look normal? By normal, I mean that the display shows what looks like normal characters and indicators. Get out the radio’s manual and look at all the front-panel indicators to make sure they are on or off as expected.
Make sure the XMIT or SEND indicator doesn’t show the radio is transmitting. Does the S meter indicate normally? On a handheld, tune to a busy repeater and watch the S-meter. If all of the usual indicators are present and S-meter readings are normal, move to the next topic. Otherwise, adjust any controls and switches related to that status or level to be sure they’re set properly.
The Radio Won’t…
At this point, you have a radio that powers up, doesn’t smell burnt, and looks normal. But it won’t “something.” Now is the time to find the radio’s user manual. Read their troubleshooting guidelines and instructions; after all, they built it! Follow those steps—I’ll wait. If you still have the problem, disconnect any unnecessary cables or accessories so you just have a basic radio. Check to be sure the problem is still present. If it is…
…Turn on the Transmitter
Check the user manual for setting up the radio in each mode. The manual typically shows a normal setting for each control, switch, and menu setting. Set up the radio exactly that way and see if anything changes. For example, it’s common for transceivers to use the VOX circuit for semi-break-in keying so you have to have VOX on for CW. On phone, in the AM/SSB/FM modes, there is often a manual transmit control called SEND or XMIT that should activate the transmitter. Be sure that works.
At this point, the problem is that the transmit indicator, such as an LED or display indicator, does not turn on when you press the mic switch, generate audio from your sound card, or send code from a key or keyer. Before assuming the radio is at fault on code, try a different key. You can substitute an unwired plug for an external keyer and use a clip lead to short the key input. On phone, if you have a spare mic, substitute it and see if that works. If you can access the PTT switch leads, use a clip lead to bypass it while watching the display.
A related problem is that the radio won’t turn the transmitter off! Remove the mic, key, and any data interface accessory cables so that there is nothing connected to the transmitter but power and an antenna. If the radio stays in transmit with Mic Gain and VOX Gain turned all the way down and in all modes, there is an internal problem. If the problem is only on one or some modes, check the input connectors for that, or those modes, to see if there is a short circuit on a keying input.
…Put Out Any Power
In this case, the radio responds to a key, PTT switch, or data audio but does not output RF power. Use an external, known-good power meter and dummy load, just to be sure. If your radio can select from more than one antenna, double-check which antenna you’re using, and test for power output on all antenna outputs. If you are using the radio’s power meter, make sure the meter is set to show power output and not some other value.
If you can put the transceiver in transmit mode but there is no output power at all, check that user manual again to be sure you have the radio configured properly. Pay particular attention to little-used knobs or concentric controls that are easily bumped or turned accidentally. Menu items can be changed by mistake, as well. Check multiple bands and modes. FM is a good test mode for multi-mode radios because it is a constant-power mode and bypasses the speech and linear amplification circuits—just key the radio and watch power output. If you have an external device generating an ALC signal, such as a linear amplifier, disconnect it to see if power returns to normal levels because a full-on ALC system can reduce output power to zero.
…Put Out Enough Power
Again, use an external wattmeter and load to be sure something in the antenna system isn’t causing trouble. High SWR will cause most transceivers to reduce power dramatically. Compare modes. If FM or CW put out full power but SSB is low, the problem might be in the microphone or speech circuits. Check menu items and gain, including speech processing and compression functions. Some radios have a DRV (drive) or CAR (carrier) control that affects output power levels. Also check ALC inputs and any ALC settings.
…Receive Anything
Unplug the external speaker or headphones so you’re listening to the internal speaker. Have someone nearby transmit a test signal and see if you can receive it. On FM, be sure you haven’t accidentally turned up the squelch so far that no signals can exceed the threshold—this is very common—and set the squelch to minimum or off. If your radio has crystal filters, switching to a non-installed filter will also deaden the receiver. Speaking of filters, remove or bypass any external bandpass filters or stubs that might not be working or are set to the wrong band.
If you can hear hiss, disconnect the antenna and replace it with a short piece of wire. You should be able to hear some signals, although faintly. If you can receive signals with only the center pin of a PL-259 connected, a feed line or other antenna system fault is likely. As with the no-power-out tests, be sure the right antenna is selected if there is a choice. If your radio has a receive antenna input (RX ANT, for example) the receiver will sound dead if the antenna is not connected or for a different band.
…Receive Very Well
If signals are present but at very low levels, your attenuator may be at a maximum setting or your RF Gain control (often concentric with AF Gain or volume) may be turned down. Other possible problems are having the passband tuning set improperly, filters set to minimum bandwidth, or DSP functions mis-configured. Noise blankers (NB) and noise reduction (NR) can be set to very high or low levels that distort or deaden receiver audio. FM radios tuned off-channel receive distorted and weaker signals, too.
For handheld radios, a bad flexible whip may be broken internally so that only very low signal levels get to the receiver input. Replace the antenna with a quarter-wavelength of wire (19″ for 2 meters) and see if signals return to normal levels. The small RF connectors on handhelds can be twisted or bent so the internal connection is intermittent or open–gently wiggling the cable or antenna may cause signals to appear and disappear.
Partial and Full Resets
With so many of the radio functions controlled or performed by software, it is possible a setting has been corrupted or mis-configured. Going through dozens of settings is tedious and error-prone. If you have thoroughly tested the radio as in the preceding steps, plus whatever else you can think of, it is time to reset the microprocessors that control the radio.
If your radio has a USB or memory card interface that can store a radio’s configuration, do that before performing a reset. Set that memory device aside, labeled so you can tell how the radio was set up when the problem was present. This might also be useful to the repair tech if that becomes necessary. When the radio is repaired and working properly, save the configuration once again.
Resets are usually done by pressing one or more control keys or switches while turning the radio on— the manual describes the procedure. You may be asked by the radio to confirm the reset by entering some other Yes/No information. Start with a soft reset and only proceed to a hard reset if necessary.
A soft or partial reset returns all of the control settings to the default value they had when the radio left the factory. These settings are also listed in your user manual. A soft reset usually does not erase any memory values, stored messages, or other items that don’t actually control the radio’s performance. The user manual will tell you which values are saved or erased.
A hard or factory reset does everything a soft reset does plus it clears all of the memories, messages, and other items the user can save. After a hard reset, the radio is configured just as it was when brand new. Anything you customized or saved will be lost, so do a hard reset as a last resort!
Troubleshooting Overview
So here’s the process I’ve just described:
- First, make sure you understand the problem.
- Second, think about any recent changes, moving the equipment, etc.
- Third, check all controls and settings per the user manual.
- Fourth, make tests to isolate the problem’s cause.
- Fifth, if the problem is caused by something external, fix that.
Keep a notebook and take a lot of notes. Don’t hesitate to put troubleshooting aside for a while and take a walk or clear your head. Describe the problem to a friend and let them ask, “Have you tried…?” questions. If you’re not sure about something, repeat a measurement or test. Try different things and record the results. When you finally do find and solve the problem, write that down, too. And tell your club or user’s group so they learn from your experience, too!
Some Da(rn)ed Thing (SDTs)
Finally, as I mentioned in my previous article, sometimes the problem just isn’t on any flow chart or decision-making tree. Maybe a pet is laying on the mic switch or there is spilled soft drink in a microphone port—who knows? How do you find these things? Mostly by staying alert and keeping an open mind for anything that “looks funny.” Keep asking yourself, “What else could cause this problem?”
Minimize the possibility of an SDT by disconnecting or removing anything unnecessary from the radio. SDTs account for a lot of equipment misbehavior, so don’t feel like you’re the first to encounter such a thing. Treat it as valuable experience and you’ll have a story to tell some day!